|
If you want to try your hand at Aerotowing, or have an electric model
that you want to rotate off ground rather than hand launching the model,
but don’t have undercarriage on your model, be it a scale glider or
sport glider, then building a quick and easy model Take-off Dolly is
your answer.
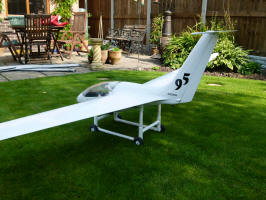
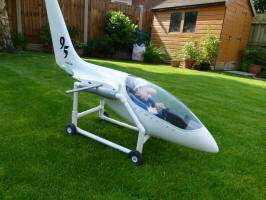
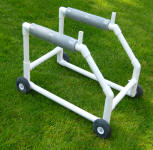
This one was made so that I could venture
into Aerotowing. It was used to launch my 1/5 Scale (3m) Pilatus B4.
Whilst the Pilatus has a fixed undercarriage, I didn’t want the wing
tips to drag on the ground and get damaged, especially that we were
taking-off from a Tarmac runway. The dolly kept the model well clear of
the ground and was very stable.
There are a number of photos of these types of take-off trolleys out
there on the web, but I could not find any plans; so I analysed the
photos and although I initially started to build from Plywood like may
others that I had seen, it was getting rather heavy. A bit of head
scratching and remembering Phil Morgan’s Model
stand, also featured on the Slope-dudes “ How To” pages, here is the
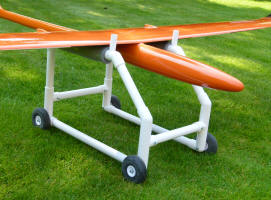
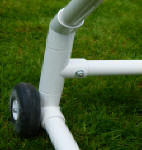
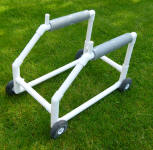
one I made also from plastic overflow pipe. It is neat,
lightweight and durable, the width can be changed to allow for larger
scale models and it works a treat, this also allows for it to be flat
packed.
Made from Plastic Overflow pipe and plastic fitting the finished product
was completed in just an afternoon. A quick trip to the local DIY store
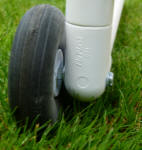
should see you obtain all the bits you need, except the wheels, you'll
need to pop into your local model shop for these. I used 3" wheel - used
on Tarmac, however, I think 4" wheels would be better suited to short
grass.
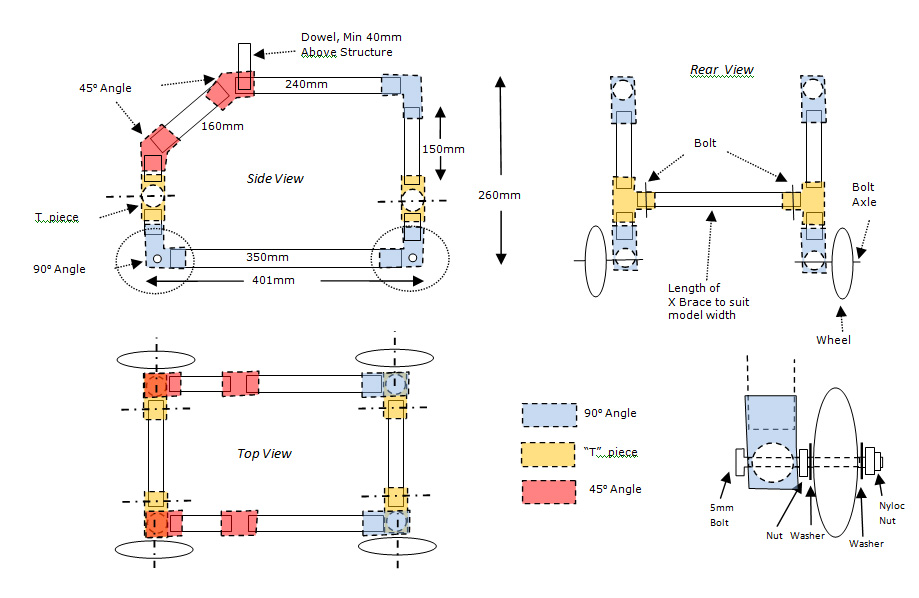
| MATERIALS |
| Length of
Plastic Pipe |
Base (2x 350mm)
Diagonal (2x 160mm)
Top (2x 240mm)
Rear (2x 150mm)
Joints (6x 30mm)
X Brace (2x 250mm (suits a 190mm width fuselage)) |
| Plastic Angles |
6 x 90° Angles
4 x 45° Angles
4 x “T” Pieces |
| Wood / Plastic Dowel |
2x Wooden Dowel / Plastic
pipe (15mm x min 50mm)
(mine are 15mm plastic doubled wall pipe with a wood dowel
inside.) |
| Wheels |
4 x Wheels (Min 80mm (3”)) |
| Bolts / Washers / Nuts |
8 x 5mm Bolts/Washes/4 x Nylock
Nuts or Optional x4 Wing nut for X Braces + 4 Normal Nuts |
| Pipe Adhesive |
|
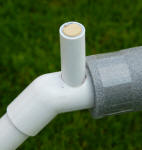
| Pipe Lagging
(Optional) |
Thin Walled Foam Pipe
Lagging as wing seat |
The Dolly height considers the prop clearance of a few Electric models
that I have, The length is optimised to suit most of my models, although
if you wanted to drop the flaps more that s few degrees, then you would
have to take this into consideration in the length of the Top Strut.
Please note that if you change the height or length of the Dolly, due to
the front angle, all pipe lengths will change.
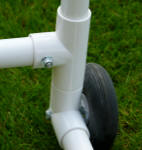
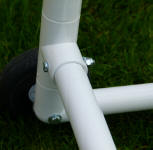
Each side made separately flat on bench and glued with pipe adhesive..
Make sure that the angles are correct and aligned and that the “T”
Pieces are angles correctly so that the finished dolly is Square. Glue
all joints except for the X braces.
Colin W |